


9 Actionable Steps for 2025: An Expert Guide on How to Maintain Truck Parts
ડિસેમ્બર 10, 2025
Abstract
The operational longevity and safety of heavy-duty trucks are intrinsically linked to the systematic and informed maintenance of their constituent parts. This document examines the multifaceted discipline of truck component upkeep in the year 2025, presenting a comprehensive framework for fleet managers, owner-operators, and technicians. It articulates a proactive maintenance philosophy, moving beyond reactive repairs to a state of preventative care. The analysis covers critical systems, including powertrain, braking, air intake, exhaust, and electrical components. Specific attention is given to the function and maintenance of the transmission solenoid valve, air flow meter, hand brake valve, truck blower motor, and truck exhaust pipe. By synthesizing technical procedures with the underlying principles of mechanical and electrical engineering, this guide provides a detailed methodology for diagnosing issues, performing regular checks, and understanding the symbiotic relationship between a truck’s various systems. The objective is to equip readers with the knowledge necessary to reduce operational costs, mitigate the risk of component failure, and ensure compliance with evolving safety and environmental standards.
Key Takeaways
- Adopt a proactive maintenance schedule to prevent costly, unexpected vehicle downtime.
- Regularly inspect and manage all vehicle fluids, including engine oil and coolant.
- Master the inspection of air brake systems, focusing on valves, hoses, and tanks.
- Learn how to maintain truck parts like the transmission and engine for peak performance.
- Routinely check the air intake and exhaust systems to ensure optimal engine breathing.
- Verify the integrity of all electrical components, from wiring to the blower motor.
- Prioritize steering and suspension checks for vehicle safety and driver comfort.
Table of Contents
- A Foundational Approach to Truck Part Maintenance
- Step 1: The Cornerstone of Reliability: Establishing a Proactive Maintenance Schedule
- Step 2: The Lifeblood of the Machine: Mastering Fluid Management
- Step 3: The Guardian of Safety: A Deep Dive into the Braking System
- Step 4: The Heart of Performance: Ensuring Powertrain Health
- Step 5: The Lungs of the Engine: Air Intake and Exhaust System Integrity
- Step 6: The Nervous System: A Guide to Electrical and Component Integrity
- Step 7: The Framework of Control: Suspension and Steering System Diligence
- Step 8: The Point of Contact: Tire and Wheel Assembly Vigilance
- Step 9: The Protective Shell: Cab and Chassis Care for Long-Term Durability
- Frequently Asked Questions (FAQ)
- Conclusion
- References
A Foundational Approach to Truck Part Maintenance
The modern heavy-duty truck, a marvel of engineering, is far more than a simple mode of transport; it is a complex ecosystem of interconnected systems working in concert. The sustained health of this ecosystem does not happen by chance. It is the result of diligence, understanding, and a commitment to care that extends from the largest engine block to the smallest sensor. To truly grasp how to maintain truck parts is to engage in a continuous dialogue with the machine, learning to interpret its sounds, vibrations, and performance cues as a language that speaks of its condition. This guide is structured as a progressive learning journey, beginning with the foundational principles of scheduled maintenance and moving through the intricate details of each major vehicle system. Our exploration is not merely a checklist of tasks but an inquiry into the "why" behind each action. Why does a minor air leak in the brake system command immediate attention? How does a slightly contaminated air flow meter impact fuel economy and engine power? By understanding the causal chains within the vehicle, an operator or technician transforms from a simple mechanic into a true custodian of the machine, capable of anticipating needs rather than merely reacting to failures.
Step 1: The Cornerstone of Reliability: Establishing a Proactive Maintenance Schedule
The most profound shift in modern vehicle care has been the movement away from a "fix it when it breaks" mentality to a philosophy of proactive, preventative maintenance. This is not merely a matter of preference but one of economic and operational necessity. An unscheduled breakdown on the road represents a cascade of costs: towing fees, emergency repair labor rates, lost revenue from delayed cargo, and potential damage to a company's reputation. A structured maintenance schedule is the bulwark against such chaos. It is a deliberate plan that imposes order on the entropic nature of mechanical wear.
Understanding Maintenance Intervals
Every truck and its components are designed with an expected service life, a concept developed through extensive engineering tests and real-world data analysis. Manufacturers provide recommended service intervals based on mileage, engine hours, or time. These are not arbitrary suggestions but are carefully calculated timelines for inspecting, servicing, or replacing parts before they are likely to fail. There are typically three tiers of inspection.
- Pre-Trip/Post-Trip Inspections: This is the most frequent and arguably one ofthe most effective practices. It is a daily ritual, a quick but thorough walk-around and systems check that can catch nascent problems.
- Preventative Maintenance (PM) Inspections: These are scheduled at regular intervals (e.g., every 15,000 miles or 3 months) and involve a more in-depth check of fluids, brakes, tires, and other key systems.
- Annual/DOT Inspections: This is a comprehensive, legally mandated inspection in many regions that examines every critical safety component of the vehicle to ensure it is roadworthy.
Creating a Customized Schedule
While manufacturer guidelines provide an excellent baseline, the optimal maintenance schedule is one that is tailored to the specific operational context of the truck. A vehicle that operates in the extreme heat of the Middle East or the cold, salt-laden roads of the northern United States will have different needs than one operating in a temperate climate. Similarly, a truck hauling heavy loads in mountainous terrain will experience greater strain on its engine and brakes than one carrying light loads on flat highways.
Consider these factors when customizing your schedule:
- Operating Environment: High dust, extreme temperatures, humidity, and road salt all accelerate wear.
- Load Weight: Heavier loads place more stress on the powertrain, suspension, and brakes.
- Terrain: Frequent hill climbing requires more from the engine and braking systems.
- Vocation: A long-haul highway truck has a different wear pattern than a vocational truck used for construction or refuse collection.
Below is a sample table that can be adapted. It illustrates how one might structure a basic schedule, but remember to consult your vehicle’s specific service manual for precise details.
| Component/System | Pre-Trip Inspection (Daily) | PM Inspection (e.g., Quarterly) | Annual Inspection |
|---|---|---|---|
| Engine Oil | Check Level | Change Oil & Filter | Lab Analysis of Oil Sample |
| Coolant | Check Level & Leaks | Check Freeze Point & SCA Levels | Flush and Replace |
| Air Brakes | Check Pressure, Drain Tanks | Inspect Linings, Hoses, Chambers | Measure Stroke, Full System Test |
| Tires | Check Pressure & Visual Condition | Measure Tread Depth, Rotate | Inspect for Irregular Wear Patterns |
| Exhaust System | Visual Check for Leaks/Damage | Inspect Mounts, Clamps | Full Inspection for Corrosion/Cracks |
| Transmission Fluid | Check Level (if applicable) | Change Fluid & Filters | Lab Analysis of Fluid Sample |
| Lights | Check All Lights & Reflectors | Clean Lenses, Check Wiring | Verify All Functions |
The Role of Technology in Modern Maintenance
In 2025, telematics and onboard diagnostic (OBD) systems are indispensable tools. These systems provide a real-time stream of data on engine performance, fault codes, fuel consumption, and more. A modern maintenance program integrates this data to move towards predictive maintenance. Instead of changing a part based on a fixed mileage, the system can analyze performance data to predict when a component, like a fuel injector or a transmission solenoid valve, is beginning to degrade. This allows for replacement at the optimal moment—just before failure, but without wasting the component's remaining useful life. This data-driven approach is the pinnacle of learning how to maintain truck parts efficiently.
Step 2: The Lifeblood of the Machine: Mastering Fluid Management
If the engine is the heart of the truck, then its various fluids are its lifeblood. These liquids cool, lubricate, clean, and transmit power. Neglecting them is akin to neglecting the health of a living organism; the consequences are gradual but ultimately catastrophic. Proper fluid management is a discipline of precision—using the right type, maintaining the right level, and changing it at the right time.
Engine Oil: More Than Just Lubrication
Engine oil is perhaps the most critical fluid. Its primary role is to create a thin, protective film between moving metal parts, preventing the catastrophic friction and heat that would otherwise fuse them together. But its duties do not end there.
- Cooling: Oil carries heat away from the hottest parts of the engine, such as the piston crowns and turbocharger bearings.
- Cleaning: Detergents and dispersants in the oil capture soot, metal particles, and other byproducts of combustion, holding them in suspension until they can be removed by the oil filter.
- Sealing: Oil helps to seal the microscopic gaps between the piston rings and the cylinder walls, ensuring proper compression.
- Corrosion Prevention: Additives in the oil neutralize acids that form during combustion, protecting internal components from corrosion.
Regularly checking the oil level via the dipstick is a non-negotiable daily task. Running an engine with low oil is a swift path to seizure. However, the quality of the oil is just as important as the quantity. Over time, heat and contamination break down the oil's additives, reducing its ability to perform its many tasks. This is why regular oil and filter changes are paramount. Following the manufacturer's recommended interval is the minimum standard. For trucks in severe service, shortening that interval is wise. An oil analysis program, where a sample of used oil is sent to a lab, can provide an incredible depth of insight into the engine's health, revealing everything from coolant leaks to excessive bearing wear long before they become major problems.
Coolant: The Temperature Regulator
The combustion process generates immense heat. The cooling system, filled with a mixture of antifreeze and water, is responsible for managing this thermal energy. The coolant circulates through passages in the engine block and cylinder head, absorbing heat, and then transfers that heat to the atmosphere via the radiator.
Proper coolant maintenance involves several checks:
- Level: A low coolant level can lead to hotspots in the engine, causing parts to warp or crack. The level should be checked daily at the overflow reservoir.
- Concentration: The ratio of antifreeze to water (typically 50/50) is important for both freeze protection in the winter and boil-over protection in the summer. A refractometer is the tool for this job.
- Additive Levels: Modern coolants contain Supplemental Coolant Additives (SCAs) that protect against corrosion and cavitation (the formation of damaging vapor bubbles). These additives are depleted over time and must be tested and replenished.
Transmission and Differential Fluids
The gears in the transmission and differential operate under extreme pressure. The specialized gear oils used here are designed to withstand these forces, preventing metal-to-metal contact. Like engine oil, these fluids also degrade over time and must be changed at the recommended intervals. Checking the fluid levels is also a part of routine PM inspections. A low fluid level can lead to overheating and rapid wear of expensive gears and bearings. When inspecting, note the fluid's color and smell. A dark, burnt-smelling fluid is a clear sign that it has been overheated and needs immediate replacement.
Step 3: The Guardian of Safety: A Deep Dive into the Braking System
There is no system on a heavy truck more directly tied to safety than its brakes. Unlike passenger cars that use hydraulic fluid, heavy trucks rely on compressed air. This system is powerful and effective, but its complexity demands rigorous and knowledgeable maintenance. The principle of air brakes is simple: compressed air is used to apply mechanical force to the brake shoes or pads, creating the friction needed to slow the vehicle. The elegance of the system lies in its fail-safe design; a loss of air pressure causes the powerful spring brakes to engage, stopping the truck (Alltruckpart.com, 2025).
The Air Supply System
The journey of the air begins at the engine-driven compressor. This component draws in outside air and compresses it, typically to around 125-135 PSI. From there, the air flows through an air dryer. This is a vital component, as moisture in the compressed air can cause internal corrosion in valves and can freeze in cold weather, leading to brake failure. The air dryer uses a desiccant material to absorb moisture. This desiccant becomes saturated and must be "purged" periodically. The "psssht" sound heard from a truck at idle is often the air dryer purging its collected moisture.
After being dried, the air is stored in several reservoirs or "tanks." These tanks hold a ready supply of compressed air for the brake system to use. Draining these tanks daily is a critical pre-trip and post-trip task. Even with an efficient air dryer, some moisture can accumulate, and draining the tanks expels it before it can cause problems.
The Control and Application System
When the driver presses the brake pedal (technically called a foot valve or treadle valve), they are not directly applying the brakes. Instead, they are opening a valve that meters a precise amount of compressed air from the tanks into the service brake lines. This application air travels to the brake chambers at each wheel.
- Brake Chambers: These are the actuators of the system. They are round metal canisters that contain a rubber diaphragm and a pushrod. When application air enters the chamber, it pushes on the diaphragm, which in turn moves the pushrod.
- Slack Adjusters: The pushrod is connected to a slack adjuster. This is a lever that converts the linear motion of the pushrod into the rotational motion needed to turn the S-cam. The slack adjuster's job is also to compensate for brake lining wear, keeping the distance the pushrod has to travel to apply the brakes within specification.
- S-Cam, Rollers, and Brake Shoes: The S-cam is an S-shaped shaft that, when rotated by the slack adjuster, forces a pair of rollers outward. These rollers press against the brake shoes, pushing their friction linings against the inside of the rotating brake drum. This friction is what stops the truck.
The Hand Brake Valve and Parking Brakes
The hand brake valve, often a yellow, diamond-shaped knob on the dash, controls the parking and emergency brakes. This system works in reverse of the service brakes. The rear brake chambers are actually two chambers in one: a service chamber and a spring brake chamber. The spring brake chamber contains a massive, powerful spring that is held in a compressed (caged) state by about 60 PSI or more of air pressure. When the driver pulls the hand brake valve, it exhausts the air from the spring brake chambers. Without air pressure to hold them back, the powerful springs expand, mechanically applying the brakes. This is the fail-safe design. If the truck were to lose all of its air pressure due to a leak, the springs would automatically apply the brakes.
Regular inspection of the entire braking system is a core part of how to maintain truck parts for safety. This involves:
- Daily Air System Check: Before driving, build air pressure to full, turn off the engine, and perform a leak-down test. The system should not lose more than 2-3 PSI per minute. Then, apply the foot brake and check for excessive pressure loss. Finally, pump the brakes to reduce air pressure and confirm that the low-air warning light and buzzer activate (around 60 PSI) and that the parking brake valve pops out (around 20-40 PSI).
- Brake Adjustment Check: During a PM inspection, check the brake adjustment. With the brakes released, pull on the slack adjuster at each wheel. The free play should be minimal (typically no more than an inch). With the brakes applied, the pushrod travel should be within the legal limits (which vary by chamber size, but are often around 2 inches). Automatic slack adjusters should maintain this adjustment, but they can fail and must be checked.
- Lining and Drum Inspection: Visually inspect the brake linings for thickness and the drums for cracks or signs of overheating (heat checking).
Step 4: The Heart of Performance: Ensuring Powertrain Health
The powertrain—comprising the engine, transmission, and driveshafts—is the system that generates and delivers the motive force to the wheels. Its health dictates the truck's power, efficiency, and reliability. Maintenance here is a matter of precision lubrication, careful monitoring, and understanding the intricate dance of mechanical and electronic components.
The Modern Diesel Engine
The heart of the powertrain is the engine. Modern heavy-duty diesel engines are highly sophisticated, utilizing high-pressure common rail fuel injection, variable geometry turbochargers (VGTs), and complex aftertreatment systems to produce immense torque while meeting stringent emissions standards.
Preventative maintenance for the engine centers on a few key areas:
- Clean Fluids: As discussed, clean oil and coolant are non-negotiable.
- Clean Fuel: Fuel filters must be changed at regular intervals. Water and contaminants in fuel can quickly destroy expensive high-pressure injectors. A water separator is the first line of defense and should be drained daily.
- Clean Air: The engine air filter prevents dust and debris from entering the engine, where it would act as an abrasive, scouring cylinder walls and piston rings. A clogged air filter restricts airflow, reducing power and efficiency. Many trucks have a filter restriction indicator to show when a change is needed.
Focus on the Transmission and the Transmission Solenoid Valve
The transmission is the engine's partner, a complex gearbox that multiplies the engine's torque to get the truck moving and allows it to operate at an efficient speed. Whether it's a manual or an automated manual transmission (AMT), its health depends on clean, correct fluid and proper operation.
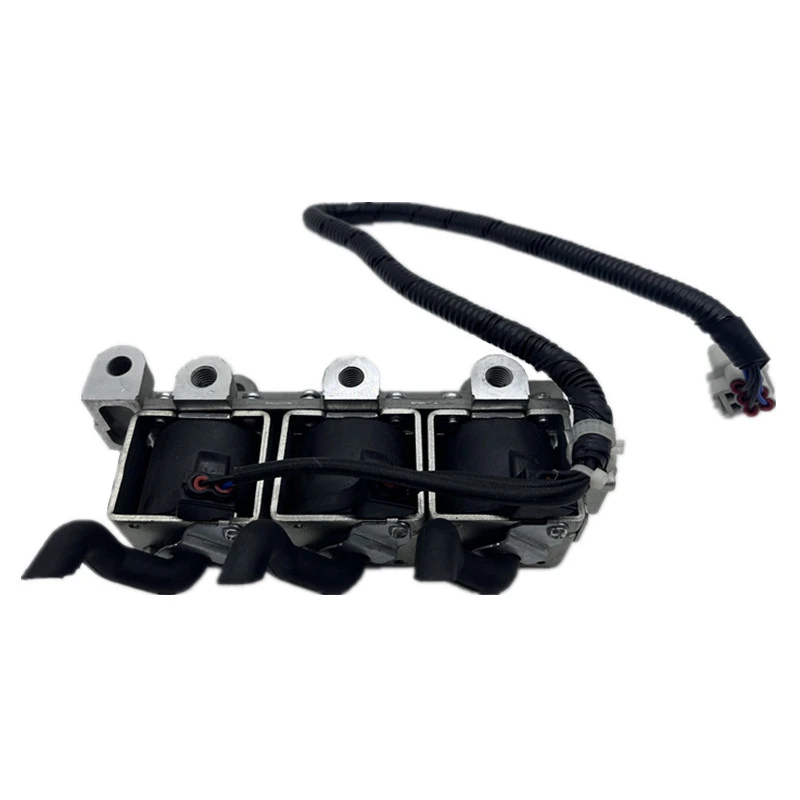
In modern AMTs, the shifting process is managed by a computer (the Transmission Control Unit or TCU) that actuates a series of solenoid valves. A transmission solenoid valve is an electromechanical valve that directs hydraulic fluid or air pressure to engage and disengage clutches and shift forks. They are the "muscles" that carry out the TCU's commands.
A failing transmission solenoid valve can manifest in several ways:
- Erratic or harsh shifting
- Delayed engagement into gear
- Being stuck in a single gear
- The illumination of a transmission warning light
Diagnosing a faulty transmission solenoid valve often starts with a diagnostic scan tool to read fault codes from the TCU. Codes might point to a specific solenoid's electrical circuit (open or shorted) or a mechanical problem (stuck open or closed). Maintenance might involve checking the electrical connections for corrosion, testing the solenoid's resistance with a multimeter, or, in many cases, replacing the solenoid or the entire valve body assembly. Using a top-tier transmission solenoid valve ensures that the shifts are crisp and reliable, preserving the longevity of the entire transmission.
| Common Transmission Fault Code | Potential Meaning | Primary Component to Check |
|---|---|---|
| P0751 | Shift Solenoid 'A' Performance/Stuck Off | Shift Solenoid 'A' |
| P0756 | Shift Solenoid 'B' Performance/Stuck Off | Shift Solenoid 'B' |
| P0776 | Pressure Control Solenoid 'B' Performance | Pressure Control Solenoid 'B' |
| P0841 | Transmission Fluid Pressure Sensor/Switch 'A' Circuit Range/Performance | Fluid Pressure Sensor, Wiring, transmission solenoid valve |
| P0962 | Pressure Control Solenoid 'A' Control Circuit Low | Wiring Harness, Pressure Control Solenoid 'A' |
Driveshafts and U-Joints
The power from the transmission is sent to the drive axles via driveshafts. These shafts have universal joints (U-joints) at their ends to allow for changes in angle as the suspension moves. U-joints are a critical maintenance point. Most require regular greasing with a high-quality chassis grease. A dry U-joint will fail quickly, often with a distinctive "squeaking" sound that changes with vehicle speed. A failed U-joint can be catastrophic, potentially causing the driveshaft to detach from the vehicle at speed, leading to immense damage and a total loss of control.
Step 5: The Lungs of the Engine: Air Intake and Exhaust System Integrity
For an engine to run efficiently, it must be able to "breathe" freely. This involves drawing in a clean, cool, dense charge of air and expelling the hot exhaust gases with minimal restriction. The air intake and exhaust systems are the respiratory tract of the engine, and their maintenance is fundamental to power, fuel economy, and emissions compliance.
The Air Intake System and the Air Flow Meter
The journey of air into the engine starts at the air filter. From there, it passes through a series of pipes, often called the Charge Air Cooler (CAC) piping, on its way to the turbocharger. The turbo compresses the air, making it denser, but also hotter. The compressed air then flows through the Charge Air Cooler—a radiator-like device that cools the air back down—before it enters the engine's intake manifold.
A critical sensor in this path on many modern engines is the air flow meter, also known as a Mass Air Flow (MAF) sensor. The air flow meter measures the mass of air entering the engine. The Engine Control Module (ECM) uses this data, along with data from other sensors, to calculate the precise amount of fuel to inject to achieve the optimal air-fuel ratio for combustion.
A dirty or faulty air flow meter can send incorrect information to the ECM, leading to a host of problems:
- Reduced engine power and poor acceleration
- Lower fuel economy
- Rough idle
- Black smoke from the exhaust (indicating a rich fuel mixture)
- Illumination of the check engine light
Maintenance of the air flow meter is a delicate process. The sensing element is extremely sensitive. If it needs cleaning, a specialized air flow meter cleaner spray should be used. Never touch the sensing element with a tool or cloth. The most common issue with the intake system, however, is leaks in the CAC piping and hoses. A leak after the turbocharger means that some of the compressed, metered air is escaping before it reaches the engine. The ECM, unaware of the leak, injects fuel based on the amount of air the air flow meter measured, resulting in a rich fuel mixture, loss of power, and high exhaust temperatures. Regular inspection of all clamps, hoses, and the CAC itself for cracks or oil residue (a sign of a leaking turbo seal and a potential leak point) is a vital part of how to maintain truck parts.
The Exhaust System and the Truck Exhaust Pipe
Once combustion is complete, the hot gases must be expelled. This is the job of the exhaust system. The gases travel from the exhaust manifold, through the turbocharger (where they spin the turbine wheel), and then into the aftertreatment system. After being "cleaned" by the aftertreatment components (like the DPF and SCR), the gases finally exit through the truck exhaust pipe and stack.
The truck exhaust pipe itself may seem like a simple component, but its integrity is important.
- Leaks: A leak in the truck exhaust pipe before or within the aftertreatment system can cause the system to malfunction, leading to fault codes and potential engine derating. A leak can also allow dangerous exhaust fumes to enter the cab.
- Restrictions: A crushed or internally collapsed truck exhaust pipe creates back pressure, which hinders the engine's ability to expel exhaust. This reduces power and efficiency and can lead to overheating of the turbocharger and exhaust manifold.
Maintenance involves regularly inspecting the entire length of the truck exhaust pipe and its mounting brackets. Look for signs of rust, cracks at the welds, and loose or broken hangers. A dangling exhaust system is a significant road hazard. When a replacement is needed, opting for a high-quality truck exhaust pipe ensures proper fitment and durability, resisting corrosion and vibration for a longer service life.
Step 6: The Nervous System: A Guide to Electrical and Component Integrity
A modern truck is as much an electronic device as it is a mechanical one. A complex network of wires, sensors, actuators, and control modules forms its nervous system, managing everything from engine operation to cabin climate. Maintaining this system requires a shift in thinking from wrenches and grease to multimeters and diagnostic software.
Wiring Harnesses and Connectors
The foundation of the electrical system is its wiring. Miles of wires are bundled into harnesses that run throughout the chassis and cab. The most common electrical problems are not failed components, but failed connections. Vibration, moisture, and corrosion are the enemies.
- Vibration: Over time, vibration can cause wires to chafe against the frame or other components, eventually wearing through the insulation and causing a short circuit.
- Moisture: Water intrusion into connectors is a primary cause of corrosion. Corroded pins create high resistance, which can prevent a component from working or cause a sensor to send an incorrect signal.
Preventative maintenance involves visually inspecting wiring harnesses to ensure they are properly secured and not rubbing against anything. During PMs, it's good practice to disconnect, inspect, and apply a thin layer of dielectric grease to critical connectors, especially those exposed to the elements. Dielectric grease does not conduct electricity, but it seals the connection, keeping moisture and oxygen out to prevent corrosion.
The Battery and Charging System
The batteries are the heart of the electrical system when the engine is off and provide the immense current needed to crank the starter motor. The alternator is responsible for recharging the batteries and powering the truck's electrical systems when the engine is running.
Battery maintenance is simple but often overlooked.
- Keep them Clean: The tops of the batteries and the terminals should be kept clean. Dirt and acid residue can create a path for electricity to leak, slowly draining the batteries. A mixture of baking soda and water is effective for neutralizing and cleaning acid.
- Keep them Tight: The battery cable connections must be clean and tight. A loose connection creates high resistance, which can prevent the batteries from charging properly and can cause a no-start condition.
- Load Testing: During a PM, the batteries should be load-tested to assess their health. A battery can show a full 12 volts but may no longer be able to supply the high amperage needed for cranking.
The alternator is generally a reliable component, but its drive belt must be in good condition and properly tensioned. A loose or worn belt will slip, reducing the alternator's output and preventing the batteries from fully charging.
The Truck Blower Motor and HVAC
Within the cab, the Heating, Ventilation, and Air Conditioning (HVAC) system is managed by a series of electrical components. A key part of this is the truck blower motor. This is a simple electric motor with a "squirrel cage" fan attached that is responsible for blowing air through the vents.
When a truck blower motor fails, the fan will either not work at all or may only work on certain speeds. If the fan works on high but not on lower speeds, the problem is often not the motor itself, but the blower motor resistor. This resistor pack uses a series of coils to reduce the voltage going to the motor, thus controlling its speed. The high-speed setting typically bypasses the resistor and sends full battery voltage to the motor.
If the fan doesn't work on any speed, the problem could be the truck blower motor itself, a blown fuse, a faulty switch, or a bad connection. To diagnose, a technician would first check the fuse. If the fuse is good, they would use a multimeter to check for voltage at the motor's connector. If voltage is present but the motor isn't running, the motor has likely failed. Maintaining the truck blower motor system primarily involves keeping the cabin air filter clean. A clogged cabin air filter restricts airflow, forcing the motor to work harder and leading to premature failure.
Step 7: The Framework of Control: Suspension and Steering System Diligence
The suspension and steering systems are what connect the driver to the road. The steering system provides directional control, while the suspension system is tasked with the dual role of supporting the vehicle's weight and isolating the cab and frame from road shocks. Wear in these systems can lead to an uncomfortable ride, poor handling, and accelerated tire wear. In a worst-case scenario, a failure can lead to a complete loss of control.
Steering System Components
The steering system translates the driver's input at the steering wheel into the turning of the road wheels. Key components include:
- Steering Gearbox: This uses hydraulic assistance to multiply the driver's effort, making it possible to turn the heavy front wheels.
- Pitman Arm: This arm connects to the output shaft of the gearbox and converts its rotational motion into the side-to-side movement needed to steer.
- Drag Link: This connects the pitman arm to the steering arm on one of the front wheels.
- Tie Rod: This rod connects the steering arms of the two front wheels, ensuring they turn together. The ends of the drag link and tie rod are called "tie rod ends," which are ball-and-socket joints that allow for movement.
Maintenance of the steering system is a critical safety task.
- Lubrication: Many tie rod ends and other steering linkage pivot points have grease fittings (zerks) and require regular lubrication with chassis grease.
- Inspection for Looseness: During a PM, a helper should turn the steering wheel back and forth while the technician watches all the linkage components. There should be no visible "slop" or looseness in any of the joints. Excessive play in the steering is a major safety hazard.
- Power Steering Fluid: The power steering fluid level should be checked regularly. Low fluid can cause a loss of power assist and can damage the pump. The fluid should also be inspected for contamination and changed if it appears dark or dirty.
Suspension System Components
The suspension system consists of springs, shock absorbers, and various linkages.
- Springs: Most heavy trucks use leaf springs, which are stacks of long, curved steel plates. Some trucks and many trailers use air springs (air bags), which are durable rubber bellows that support the load on a cushion of air.
- Shock Absorbers: Springs support the weight, but they have a tendency to oscillate or bounce after hitting a bump. Shock absorbers are hydraulic dampers that control this oscillation, keeping the tires in firm contact with the road.
- Linkages: Various rods, like torque rods and track bars, are used to locate the axle, preventing it from moving forward, backward, or side-to-side while still allowing it to move up and down.
Suspension maintenance focuses on inspection.
- Leaf Springs: Inspect for broken or cracked leaves. A broken main leaf is a serious safety issue. Also, check the U-bolts that hold the axle to the spring pack to ensure they are tight.
- Air Springs: Inspect the air bags for chafing, cuts, or weather cracking. A leaking air bag will cause the truck to lean and can overload the remaining springs.
- Shock Absorbers: Look for signs of fluid leakage from the shock body, which indicates a failed seal. A worn shock will often result in a bouncy ride and cupped wear on the tires.
- Bushings: All the suspension linkages pivot on rubber or polyurethane bushings. Inspect these for cracking, tearing, or being "walked out" of their bores. Worn bushings will cause clunking noises and can affect alignment.
A well-maintained steering and suspension system is not just about safety; it's about driver comfort and fatigue. A truck that wanders on the road or bounces excessively is tiring to drive, which itself is a safety concern.
Step 8: The Point of Contact: Tire and Wheel Assembly Vigilance
The tires are the truck's only connection to the road. Everything the truck does—accelerating, braking, and turning—is transmitted through four small contact patches. The immense responsibility carried by the tires demands that their maintenance be taken with the utmost seriousness. Proper tire care is a cornerstone of how to maintain truck parts for safety and efficiency.
The Importance of Correct Inflation Pressure
The single most important aspect of tire maintenance is maintaining the correct inflation pressure. Air is what allows the tire to carry its load.
- Underinflation: An underinflated tire flexes excessively, which builds up a tremendous amount of heat. This heat is the number one killer of tires, breaking down the internal structure and leading to catastrophic blowouts. Underinflation also increases rolling resistance, which directly harms fuel economy.
- Overinflation: An overinflated tire has a smaller contact patch and will wear out prematurely in the center of the tread. It also provides less traction and results in a harsh, jarring ride, which can damage suspension components and cargo.
Tire pressure should be checked daily with a quality air gauge when the tires are cold. Do not rely on thumping them with a hammer; it is a notoriously inaccurate method. The correct pressure is not the "max pressure" stamped on the sidewall, but the pressure recommended by the vehicle manufacturer based on the load being carried. Many fleets now use Tire Pressure Monitoring Systems (TPMS) that provide real-time pressure data to the driver, a technology that has saved countless tires from premature failure.
Tread Depth and Wear Patterns
Tread depth is critical for traction, especially on wet roads. The grooves in the tread are designed to channel water away from the contact patch. As the tread wears down, this ability is diminished. Legally, a steer tire must be replaced when the tread depth reaches 4/32 of an inch in any major groove, and drive or trailer tires at 2/32 of an inch. However, for optimal safety, many fleets replace them sooner.
Inspecting the tires for irregular wear patterns can also act as a diagnostic tool for the rest of the truck.
- Wear on both shoulders: This is a classic sign of underinflation.
- Wear in the center: This indicates overinflation.
- Cupping or Scalloping: This pattern of dished-out spots in the tread is often caused by worn shock absorbers or an imbalance in the wheel assembly.
- Feathered Wear: If the tread blocks are worn so they feel sharp on one edge and rounded on the other, it's a sign of a misalignment issue, such as incorrect toe or worn steering components.
Wheel and Hub Integrity
The wheel itself and the hub it mounts to also require inspection.
- Lug Nuts: On a daily walk-around, look for rust streaks radiating from the lug nuts, which can indicate a loose nut. Periodically, the torque of all lug nuts should be checked with a torque wrench to ensure they are at the manufacturer's specification.
- Wheel Bearings and Seals: During a PM, the wheel should be checked for excessive play, which could indicate a worn wheel bearing. Also, inspect the hub seal on the inside of the wheel. A leaking hub seal will allow the gear oil that lubricates the bearings to escape, leading to rapid bearing failure. The hub oil level should be visible through the sight glass on the hub cap and should be maintained at the proper level.
Step 9: The Protective Shell: Cab and Chassis Care for Long-Term Durability
While the mechanical and electrical systems are the functional core of the truck, the cab and chassis form its skeleton and skin. Their care is not just about aesthetics; it is about protecting the vehicle's structural integrity and the valuable components they house from the elements. This final step in our journey of how to maintain truck parts focuses on preservation.
Frame and Crossmember Inspection
The frame is the backbone of the truck. It is subjected to constant stress, vibration, and twisting forces. Regular cleaning and inspection are essential.
- Cleaning: A clean frame is easier to inspect. Pressure washing can remove road grime and de-icing chemicals that promote corrosion.
- Inspection for Cracks: Pay close attention to areas around suspension hangers, crossmembers, and the fifth wheel mounting points. A small crack, if caught early, can often be repaired. If left to propagate, it can lead to a catastrophic frame failure.
- Corrosion: Look for bubbling paint or heavy rust, which can weaken the frame over time. Treating rust spots and maintaining a good coat of paint or undercoating is the best defense.
- Unauthorized Modifications: Never drill holes in the top or bottom flanges of the frame rails, as this can severely compromise their strength. Any modifications should be done in accordance with the manufacturer's guidelines.
Cab and Body Care
The cab is the driver's office and home. Keeping it clean and well-maintained contributes to driver comfort and morale.
- Washing and Waxing: Regular washing removes corrosive elements from the paint surface. A coat of wax provides an additional layer of protection.
- Seals and Weatherstripping: Inspect the door and window seals for cracking or tearing. Good seals prevent water leaks that can lead to interior damage and electrical problems.
- Mirrors and Glass: Keep all mirrors and windows clean for maximum visibility. Check that mirror mounts are tight and that any heating elements are functional.
- Cab Mounts: The cab itself sits on rubber mounts that isolate it from frame vibration. Inspect these mounts for deterioration. Worn mounts can lead to a rough ride and can cause stress cracks to form in the cab structure.
The Fifth Wheel
The fifth wheel is the critical connection point between the tractor and the trailer. Its proper function is a matter of absolute safety.
- Cleaning and Greasing: The top plate of the fifth wheel should be kept clean and properly lubricated with a suitable fifth wheel grease. This allows the trailer to pivot smoothly when turning.
- Jaw and Lock Mechanism: Before coupling, visually inspect the locking jaws for damage or excessive wear. After coupling, perform a "tug test" by gently pulling forward with the trailer brakes applied to ensure the kingpin is securely locked.
- Mounting: Regularly check the bolts that secure the fifth wheel to the truck's frame to ensure they are tight.
By following these nine comprehensive steps, an operator or technician can build a robust and effective maintenance regimen. This disciplined approach transforms vehicle care from a series of chores into a practice of stewardship, ensuring the truck remains a safe, reliable, and profitable asset for its entire service life.
Frequently Asked Questions (FAQ)
1. How often should I drain my truck's air tanks? You should drain the air tanks daily. This is a crucial pre-trip and post-trip inspection item. Draining the tanks removes any accumulated moisture, which prevents internal corrosion of brake system components and protects against freezing and potential brake failure in cold weather.
2. What are the signs of a failing transmission solenoid valve? Symptoms of a failing transmission solenoid valve include harsh or erratic shifting, a delay when moving from park to drive or reverse, the transmission getting stuck in a gear, or the check engine/transmission warning light illuminating on the dashboard.
3. Why is my truck's exhaust producing black smoke? Black smoke is an indication of an overly rich fuel mixture, meaning the engine is burning too much fuel for the amount of air it's receiving. Common causes include a clogged engine air filter, a faulty air flow meter, leaking or malfunctioning fuel injectors, or a leak in the charge air cooler (CAC) system.
4. What does the yellow knob on my truck's dashboard do? The yellow, diamond-shaped knob is the parking brake control valve. Pulling the knob out releases the air pressure that holds the powerful spring brakes in the "off" position, causing them to apply and park the vehicle. Pushing it in supplies air to release the spring brakes.
5. My truck's fan only works on the highest speed. What's the problem? When the truck blower motor only functions on the highest setting, the most common culprit is a failed blower motor resistor. The resistor pack controls the lower fan speeds, while the high-speed setting typically bypasses it. If the resistor fails, only the direct, high-speed connection will work.
6. Is it necessary to use OEM parts for repairs? While OEM (Original Equipment Manufacturer) parts guarantee a perfect fit and are built to the manufacturer's exact specifications, high-quality aftermarket parts can be a cost-effective alternative. The key is to source parts from reputable suppliers who meet or exceed OEM standards to ensure reliability and performance.
7. How can I tell if my truck's shock absorbers are bad? Signs of worn shock absorbers include a bouncy, unstable ride, excessive vehicle sway in turns, and a "cupping" wear pattern on the tires. You may also see hydraulic fluid leaking from the body of the shock absorber, which is a definitive sign of failure.
8. What is a "tug test" and why is it important? A tug test is a safety check performed immediately after coupling a tractor to a semi-trailer. After ensuring the fifth wheel jaws have locked around the trailer's kingpin, the driver applies the trailer brakes only and gently tries to pull the tractor forward. If the connection is secure, the tractor will be held in place. This test confirms that the trailer is properly and safely attached before driving away.
Conclusion
The stewardship of a heavy-duty truck is a profound responsibility, one that extends to the safety of the driver and all who share the road, as well as to the economic viability of the transport operation. The principles and practices detailed in this guide offer a pathway to mastering this responsibility. By embracing a proactive maintenance culture, understanding the intricate workings of systems from the air brakes to the transmission solenoid valve, and performing diligent inspections, you can significantly extend the life of your vehicle and its components. This knowledge is not static; it is a continuous engagement with the evolving technology of these incredible machines. A well-maintained truck is a testament to the professionalism of its operator, a reliable partner on the road, and a sound investment for the future.
References
Alltruckpart.com. (2025). The ultimate guide to air brake systems for heavy-duty trucks. Retrieved from
Allelcoelec.com. (2025). Purge valve guide: Function, symptoms, testing, and replacement for optimal engine performance. Retrieved from ,Symptoms,Testing,and-Replacement-for-Optimal-Engine-Performance.html
Finditparts.com. (2025). Peterbilt truck parts | OEM part number lookup, online catalog, cross reference search. Retrieved from
Finditparts.com. (2025). Semi truck valves | Part replacement lookup & cross reference search. Retrieved from
Finditparts.com. (2025). Standard ignition truck parts | Part number lookup, online catalog, cross reference search. Retrieved from
Partsfortrucks.com. (2025). Air system components. Retrieved from
Vanhorntruckparts.com. (2024). The anatomy of a semi-truck air valve system. Retrieved from https://vanhorntruckparts.com/blogs/all/the-anatomy-of-a-semi-truck-air-valve-system