


How to Install Truck Parts: An Expert’s 6-Step Guide for 2025
Decembro 3, 2025
Abstract
This guide presents a methodical and comprehensive framework for the installation of various heavy-duty truck components. It operates on the principle that successful mechanical work is a function of diligent preparation, systematic execution, and a foundational understanding of the part's role within the larger vehicular system. The document details the preparatory steps, including safety protocols, tool acquisition, and workspace organization, which are universal to any component replacement. It then provides discrete, step-by-step installation procedures for several critical parts: the transmission solenoid valve, the air flow meter, the hand brake valve, the truck blower motor, and the truck exhaust pipe. Each procedure is contextualized with an explanation of the component's function and common diagnostic indicators. The objective is to equip both professional technicians and dedicated enthusiasts with the knowledge to perform these installations safely and effectively, thereby enhancing vehicle reliability and performance. This approach underscores the importance of precision and informed practice in automotive maintenance.
Key Takeaways
- Always prioritize safety; disconnect the battery and use appropriate personal protective equipment.
- Confirm part compatibility using the vehicle's VIN before beginning the installation.
- Organize your tools and workspace to ensure an efficient and orderly repair process.
- Follow a systematic approach for how to install truck parts to prevent errors and ensure success.
- Perform thorough post-installation checks to verify functionality and safety.
- Clean mounting surfaces and surrounding areas meticulously before fitting new components.
- Consult a professional if the procedure exceeds your skill level or tool availability.
Table of Contents
- Preparing for a Successful Installation: The Foundational Steps
- Installing a Transmission Solenoid Valve: A Guide to Precision
- Replacing an Air Flow Meter: Restoring Engine Efficiency
- Servicing a Hand Brake Valve: A Deep Dive into Air Brake Systems
- Changing a Truck Blower Motor: A Task of Cabin Comfort
- Fitting a New Truck Exhaust Pipe: Managing Fumes and Performance
- Post-Installation Checks and Testing: The Final Verification
- Frequently Asked Questions (FAQ)
- Conclusion
- References
Preparing for a Successful Installation: The Foundational Steps
Embarking on the task of installing a new truck part is not merely a mechanical act; it is an exercise in responsibility. The integrity of your vehicle, and indeed the safety of yourself and others, rests upon the precision and care you bring to the workshop. Before a single bolt is turned, a foundation must be laid. This foundation is built upon three pillars: safety, preparation, and knowledge. Neglecting any one of these can lead to component failure, vehicle damage, or personal injury. Let us consider this preparatory phase as the intellectual and logistical groundwork that ensures the physical work proceeds smoothly and correctly. It is the phase where we cultivate an environment of control and foresight, mitigating the risks inherent in any mechanical endeavor.
Safety First: A Non-Negotiable Protocol
The workshop can be a place of immense satisfaction, but it also harbors potential dangers. Acknowledging and respecting these risks is the first mark of a true professional or a serious enthusiast. Before you begin to learn how to install truck parts, you must internalize a set of safety protocols.
First, secure the vehicle. It must be parked on a level, solid surface. An unexpected roll can be catastrophic. Engage the parking brake and, as an added measure, chock the wheels on the axle you are not working on. If the work requires lifting the vehicle, use a jack with a load capacity that far exceeds the truck's weight and always, without exception, support the raised vehicle with appropriately rated jack stands. Never trust a hydraulic jack alone to bear the load while you are underneath.
Second, neutralize the electrical system. The modern truck is a complex network of electronics. Disconnecting the negative terminal of the battery prevents accidental short circuits, which could damage sensitive components like the Engine Control Unit (ECU), and eliminates the risk of electrical shock. Think of it as putting the vehicle's nervous system to sleep before surgery.
Finally, protect yourself. Personal Protective Equipment (PPE) is not optional. Safety glasses are essential to shield your eyes from flying debris, dripping fluids, and tool slips. Wear durable gloves to protect your hands from cuts, grease, and chemical exposure. For tasks involving significant noise, dust, or fumes, such as cutting an old truck exhaust pipe, hearing protection and a respirator are also necessary.
The Right Tools for the Job
Attempting a repair with the wrong tools is a recipe for frustration and failure. It can lead to stripped bolts, damaged parts, and incomplete work. A well-prepared mechanic assesses the job beforehand and assembles a complete toolkit. This foresight prevents the momentum-killing experience of having to stop midway through a procedure to find or purchase a missing tool.
Your toolkit should be built around a core of high-quality essentials: a comprehensive socket and ratchet set (in both metric and imperial sizes), a variety of wrenches (open-end, box-end, and adjustable), screwdrivers, pliers, and a torque wrench. The torque wrench is particularly vital. Every critical fastener on a truck has a specific torque specification set by the manufacturer. Overtightening can stretch and weaken bolts or damage components, while undertightening can allow parts to loosen over time. Adhering to these specifications is a fundamental aspect of a professional repair. For specific jobs, you may need specialized tools like flare nut wrenches for brake lines, sensor sockets for an air flow meter, or gasket scrapers for creating a clean seal.
| Tool/Equipment Category | Essential Items | Recommended for Specific Jobs |
|---|---|---|
| Safety Equipment | Safety Glasses, Mechanic's Gloves, Jack Stands, Wheel Chocks | Respirator, Hearing Protection, Fire Extinguisher |
| Hand Tools | Socket Set (Metric & Imperial), Wrench Set, Screwdriver Set, Pliers | Torque Wrench, Breaker Bar, Pry Bars, Hammers |
| Specialty Tools | Flare Nut Wrenches, Sensor Sockets, Gasket Scraper, Trim Removal Tools | |
| Cleaning & Prep | Degreaser, Brake Cleaner, Wire Brushes, Shop Towels | Gasket Remover Spray, Threadlocker, Anti-Seize Compound |
| Diagnostic Tools | OBD-II Scanner, Multimeter, Test Light |
Knowledge and Workspace Preparation
The final preparatory element is a combination of knowledge and environment. Before you begin, obtain the service manual for your specific truck model. This document is the most authoritative source of information, providing detailed procedures, diagrams, and torque specifications. Study the relevant section to understand the scope of the work. Watch a few instructional videos from reputable sources to visualize the process, but always defer to the official service manual.
Prepare your workspace. A clean, well-lit, and organized area reduces the risk of losing small parts and makes the entire process more pleasant. Use a magnetic tray or labeled containers to keep track of fasteners as you remove them. This simple habit can save a tremendous amount of time and confusion during reassembly. Lay out your tools in the order you expect to use them. Ensure you have adequate lighting, using a headlamp or work light to illuminate the specific area you are working on. A clean workspace reflects a clear mind, and both are indispensable for high-quality mechanical work.
Installing a Transmission Solenoid Valve: A Guide to Precision
The automatic transmission in a heavy-duty truck is a marvel of hydraulic and electronic engineering. It relies on a series of transmission solenoid valves to direct the flow of transmission fluid, which in turn engages the various clutches and bands to shift gears. A faulty solenoid can manifest as delayed shifting, harsh engagement, or the transmission becoming stuck in a single gear. The process of how to install truck parts like this one demands cleanliness and precision, as even a small particle of dirt can disrupt the valve's operation.
Understanding the Role of a Transmission Solenoid
Imagine a highly sophisticated traffic control system for fluid. That is, in essence, the function of a transmission solenoid valve. It is an electromechanical valve that opens and closes based on electrical signals from the Transmission Control Module (TCM). When the TCM determines a gear change is needed, it sends a voltage to the appropriate solenoid. The solenoid's internal plunger then moves, opening a passage and allowing pressurized transmission fluid to flow to a specific clutch pack, thereby engaging the next gear. A complete set of these valves, often housed in a single unit called a solenoid pack or valve body, orchestrates the intricate dance of every gear shift. When you need a replacement, sourcing a dependable transmission solenoid valve is the first step toward restoring smooth operation.
Step-by-Step Installation Procedure
The installation of a transmission solenoid valve typically involves accessing the transmission's valve body, which is located inside the transmission oil pan.
- Preparation and Fluid Drain: After ensuring the truck is safely secured and the battery is disconnected, position a large drain pan under the transmission. Loosen the bolts on the transmission oil pan, starting from one corner. Allow the fluid to drain from the corner before removing the remaining bolts. Be prepared; this can be a messy process. Once the pan is removed, you will see the valve body and its network of solenoids.
- Filter Removal: The transmission filter will likely be attached to the valve body. It usually pulls straight off or is held by a few small bolts. Remove it and set it aside. You should always replace the filter when servicing the transmission.
- Solenoid Identification and Removal: Consult your service manual to correctly identify the specific solenoid you need to replace. It might be a single unit or part of a larger solenoid pack. Disconnect the electrical connector carefully; these connectors can become brittle with age. Then, remove the bolts holding the solenoid or solenoid pack to the valve body. Pay close attention to the length and location of these bolts, as they are often not interchangeable.
- New Solenoid Installation: Before installing the new solenoid, ensure the mounting surface on the valve body is perfectly clean. Lightly lubricate the O-rings on the new solenoid with fresh transmission fluid to ensure a good seal and prevent tearing. Carefully position the new solenoid and start the mounting bolts by hand to avoid cross-threading. Use your torque wrench to tighten the bolts to the manufacturer's specified value. Reconnect the electrical connector, making sure it clicks securely into place.
- Reassembly and Fluid Refill: Install the new transmission filter. Clean the old gasket material from both the transmission housing and the oil pan. Apply a new gasket (or RTV sealant, if specified) to the pan, and reinstall it, torquing the bolts in a crisscross pattern to ensure even pressure. Finally, refill the transmission with the correct type and amount of automatic transmission fluid (ATF) through the dipstick tube. This is a critical step; using the wrong fluid can quickly destroy a transmission.
Common Pitfalls and How to Avoid Them
The most common error in this job is contamination. The internal passages of a valve body are minuscule, and any dirt, debris, or lint from a rag can cause a new solenoid to stick or fail. Meticulous cleanliness is paramount. Another pitfall is improper torque. Over-tightening valve body bolts can warp the assembly, causing fluid to leak internally and leading to erratic shifting. Always use a torque wrench. Finally, ensure all electrical connections are clean and secure. A poor connection can mimic the symptoms of a failed solenoid.
Replacing an Air Flow Meter: Restoring Engine Efficiency
The air flow meter, or Mass Air Flow (MAF) sensor, is a critical sensor for the engine management system. It measures the mass of air entering the engine's intake. The ECU uses this information, along with data from other sensors, to calculate the precise amount of fuel to inject for optimal combustion. A failing air flow meter can lead to a host of performance issues, including a rough idle, poor acceleration, decreased fuel economy, and the illumination of the check engine light. Replacing it is often a straightforward task that can yield significant improvements in engine performance.
The Function of the Air Flow Meter
Think of the air flow meter as the engine's lungs, telling the brain (the ECU) exactly how much air is being inhaled with each breath. Most modern trucks use a "hot-wire" type MAF sensor. This design uses a heated wire or film placed in the incoming air stream. As air flows past the wire, it cools it down. The sensor's circuitry then applies more current to maintain the wire's constant temperature. The amount of current required is directly proportional to the mass of the air flowing past it. This data is sent to the ECU as a voltage signal, allowing for instantaneous adjustments to the fuel-to-air ratio. A precise measurement is vital for both power and emissions control (Gao et al., 2021).
Step-by-Step Installation Guide
The MAF sensor is located in the intake tract, between the air filter box and the throttle body.
- Locate and Disconnect: Open the hood and find the air intake ducting. The MAF sensor is a small electronic component, typically rectangular, plugged into this ducting with a wiring harness attached.
- Disconnect the Electrical Connector: Carefully depress the locking tab on the electrical connector and pull it straight off the sensor. Inspect the connector for any corrosion or damage.
- Remove the Sensor: The sensor may be held in place by two screws (often with security heads like Torx) or it might be part of a larger section of the intake tube that is secured by hose clamps. If it is screwed in, remove the screws and gently pull the sensor out of the housing. If it is part of a tube section, loosen the hose clamps at either end and remove the entire section.
- Install the New Sensor: Before installing the new air flow meter, check the intake housing for any dirt or debris and clean it if necessary. If your new sensor is a standalone unit, ensure its O-ring is properly seated and gently insert it into the housing. Reinstall the screws, tightening them snugly but not excessively. If you removed a tube section, reinstall it and tighten the hose clamps.
- Final Connections: Reconnect the electrical connector, making sure it is fully seated. Before starting the engine, it is good practice to reset the ECU. This can sometimes be done by disconnecting the battery for about 15 minutes, which clears any learned fuel trim adjustments based on the old, faulty sensor.
Avoiding Common Installation Mistakes
One major mistake is touching the sensing element of the new air flow meter. The hot wire or film is extremely delicate and can be damaged by oils from your skin or by physical contact. Handle the new sensor only by its plastic housing. Another issue is installing the sensor backward. Most MAF sensors have an arrow indicating the direction of airflow; ensure this arrow points toward the engine's throttle body. Finally, beware of counterfeit parts. A low-quality, uncalibrated sensor can perform worse than the old one. It is wise to invest in a quality component from a reputable supplier.
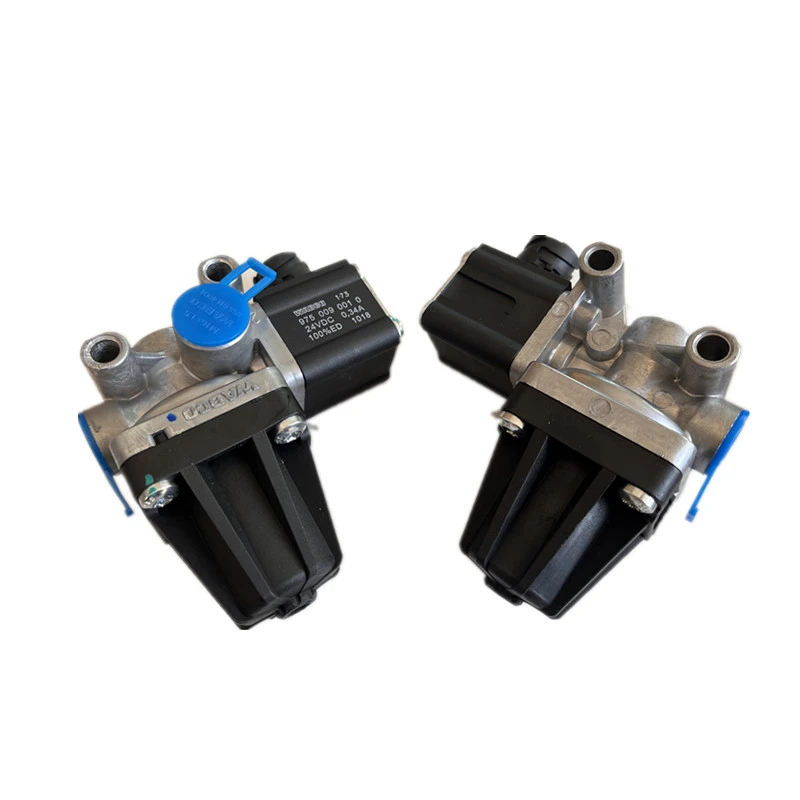
Servicing a Hand Brake Valve: A Deep Dive into Air Brake Systems
The rhythmic hiss of a truck's air brakes is a familiar sound, a testament to a powerful and reliable system. Unlike the hydraulic brakes in passenger cars, heavy-duty trucks use compressed air to generate the immense force needed to stop tens of thousands of pounds. The hand brake valve, often a yellow, diamond-shaped knob on the dashboard, is a critical control interface for the parking and emergency brake functions of this system. Understanding how to service this valve requires a foundational grasp of the entire air brake network.
The Principles of a Truck Air Brake System
An air brake system can be understood as a chain of command, beginning with the engine-driven air compressor. This compressor pressurizes air and sends it to storage tanks, or reservoirs. An air dryer is placed in-line to remove moisture, which could otherwise freeze in cold weather or cause corrosion (All Truck Parts, 2025). The system is divided into several independent circuits by a four-circuit protection valve, ensuring that a leak in one circuit does not disable the entire system (chinatruck.cc).
The service brakes (operated by the foot pedal) and the parking/emergency brakes are two distinct but interconnected parts of this system. The magic of the parking brake system lies in the spring brake chambers located at the wheels. These chambers contain a powerful spring that is held in a compressed, or caged, state by air pressure. When you are driving, the system is pressurized, and the brakes are released. The hand brake valve controls the air pressure to these spring brake chambers. When you pull the hand brake valve, it releases the air pressure, allowing the powerful springs to expand and mechanically apply the brakes. This design is fail-safe; if the truck loses all air pressure, the springs will automatically engage the brakes, preventing a runaway situation.
A Guide to Installing a New Hand Brake Valve
Replacing a hand brake valve is a common repair. These valves can develop internal leaks, causing a loss of air pressure, or they can simply wear out and fail to operate correctly.
- Depressurize the System: Before working on any air brake component, you must completely drain all air from the system. Open the drain cocks, or "spitters," on all air tanks until the pressure gauges on the dash read zero. You should hear all the air hiss out. This is a crucial safety step.
- Access the Valve: The hand brake valve is mounted on the dashboard. You will need to remove the dash panel or trim surrounding it to gain access to the back of the valve and its air line connections.
- Label and Disconnect Air Lines: The back of the valve will have several air lines connected to it, typically with threaded fittings. Before disconnecting anything, use tape and a marker to label each air line according to the port it connects to on the valve (ports are often stamped with numbers or letters). This is the single most important step to ensure correct reassembly. Once labeled, use the appropriate size flare nut wrench to carefully disconnect the lines.
- Remove the Old Valve: Unscrew the mounting nut on the front of the dash that holds the valve in place. The old valve can now be removed from behind the dashboard.
- Install the New Hand Brake Valve: Compare the new valve to the old one to ensure it is the correct replacement. Mount the new hand brake valve onto the dashboard and secure it with the mounting nut. Reconnect the air lines to their corresponding ports on the new valve, as you labeled them. Tighten the fittings securely but avoid over-tightening, which can damage the threads or the valve body.
- Re-pressurize and Test: Close all air tank drain cocks. Start the truck and allow the air system to build pressure up to its normal operating range (typically 120-135 PSI). As the system pressurizes, listen carefully for any hissing sounds from the new valve or its fittings, which would indicate a leak. Use a solution of soapy water and spray it on the fittings; bubbles will form if there is a leak. Once the system is at full pressure, test the operation of the new valve. Push it in to release the parking brakes and pull it out to apply them, confirming the brakes engage and disengage as expected.
Table: Air Brake System Troubleshooting
| Symptom | Possible Cause | Diagnostic/Corrective Action |
|---|---|---|
| Air pressure builds slowly | Clogged air filter, worn compressor rings, leak in the system. | Inspect/replace air filter. Perform compressor buildup test. Check for audible leaks. |
| Air dryer constantly purges | Leaky purge valve in the air dryer, faulty governor. | Rebuild or replace air dryer purge valve. Test and replace governor if needed. |
| Brakes are slow to release | Faulty quick release valve, restricted air lines. | Inspect/replace quick release valves near brake chambers. Check for kinked or clogged lines. |
| Audible air leak when parked | Leaking valve (hand brake, foot valve), fitting, or brake chamber diaphragm. | Use soapy water to systematically check all connections, valves, and chambers for leaks. |
| Parking brake won't release | Low air pressure, faulty hand brake valve, seized brake components. | Ensure system is at full pressure. Verify hand valve is sending air. Inspect brake mechanics. |
Changing a Truck Blower Motor: A Task of Cabin Comfort
While not as critical to the vehicle's operation as a brake valve, the truck blower motor is essential for driver comfort and safety. It powers the fan that pushes heated or cooled air through the cabin's vents, providing climate control and defrosting the windshield. When a truck blower motor fails, the result is a silent HVAC system, a frigid cabin in winter, or a sweltering one in summer. The replacement process is usually manageable for a DIY-er and can restore a comfortable working environment for the driver.
How the Blower Motor System Works
The blower motor is a simple DC electric motor connected to a cage-like fan, often called a "squirrel cage." Its speed is controlled by the HVAC panel on the dashboard. In most systems, the driver's fan speed selection does not directly control the motor. Instead, it sends a signal to a blower motor resistor (or a more modern control module). This resistor pack contains several coils of varying resistance. When you select a lower fan speed, the current is routed through one or more of these coils, reducing the voltage supplied to the motor and making it spin slower. On the highest speed setting, the current often bypasses the resistor entirely, sending full battery voltage to the motor for maximum output. A common symptom of a failed resistor—not a failed motor—is when the fan only works on the highest setting.
Step-by-Step Installation of a New Blower Motor
The blower motor is almost always located on the passenger side of the cabin, under the dashboard, or sometimes on the engine side of the firewall within the HVAC housing.
- Locate the Motor: On the passenger side, look up under the dashboard. You will typically see a round, plastic housing with a couple of wires leading to it. This is the blower motor assembly.
- Disconnect and Remove: Disconnect the electrical connector from the motor. The motor is usually held in place by a few small screws (often 8mm or 10mm). There may also be a small cooling tube attached to the motor that needs to be disconnected. Remove the mounting screws. The motor and fan cage assembly should then drop down and out of the HVAC housing. This can sometimes require a bit of maneuvering around other components.
- Transfer the Fan Cage (If Necessary): Some replacement motors come without the fan cage. If this is the case, you will need to carefully transfer the cage from the old motor to the new one. It is typically held on the motor shaft by a small retaining clip or a set screw.
- Install the New Motor: Before installing the new truck blower motor, take a moment to clean out any leaves or debris from the inside of the HVAC housing. Guide the new motor and fan assembly up into the housing. Ensure it is seated correctly and that the fan does not rub against the sides of the housing.
- Secure and Reconnect: Reinstall the mounting screws, tightening them until they are snug. Reconnect the electrical connector and the cooling tube, if applicable.
- Test the Operation: Reconnect the vehicle's battery. Turn the ignition to the "on" position and test the blower motor at all speed settings to ensure it is working correctly and quietly.
Addressing Common Issues
The most frequent issue encountered is difficulty accessing the motor's mounting screws, which can be tucked away in awkward positions. A variety of socket extensions and a flexible ratchet can be invaluable. Another problem can be a noisy new motor, which often indicates that the fan cage is not properly balanced or is hitting the inside of the housing. Ensure it is fully seated on the motor shaft and that the housing is clear of obstructions before final installation.
Fitting a New Truck Exhaust Pipe: Managing Fumes and Performance
The exhaust system of a truck does more than just quiet the engine's roar; it is a carefully engineered system designed to safely route hot, toxic gases away from the vehicle and its occupants. It also plays a role in engine performance and emissions control. A leaking or damaged truck exhaust pipe can lead to failed emissions tests, reduced engine performance, and the dangerous possibility of carbon monoxide entering the cabin. Replacing a section of the exhaust is a common repair, though it can be physically demanding due to rust and component size.
The Anatomy of a Heavy-Duty Exhaust System
A truck's exhaust system begins at the exhaust manifold or turbocharger, where gases exit the engine. From there, it flows through a series of pipes to the aftertreatment system, which on modern diesel trucks (post-2010) includes a Diesel Oxidation Catalyst (DOC), a Diesel Particulate Filter (DPF), and a Selective Catalytic Reduction (SCR) system. These components work together to reduce harmful emissions like soot, nitrogen oxides, and unburnt hydrocarbons (Majewski & Khair, 2006). After the aftertreatment system, the "cleaner" exhaust travels through more piping, a muffler to reduce noise, and finally exits through the tailpipe or stacks. The various sections are connected with specialized clamps, flanges, and gaskets designed to withstand extreme temperatures and vibration.
Step-by-Step Replacement Guide
This guide focuses on replacing a section of pipe, such as from the aftertreatment unit to the muffler.
- Preparation and Safety: This job must be done when the exhaust system is completely cold. Exhaust components can reach extremely high temperatures and cause severe burns. Safely raise and support the vehicle to gain adequate working space underneath. Wear safety glasses and heavy-duty gloves.
- Inspect and Plan: Thoroughly inspect the section of the truck exhaust pipe you intend to replace. Identify all clamps, hangers, and flange bolts that need to be removed. Rust is your primary enemy in this job.
- Apply Penetrating Oil: Liberally spray all nuts, bolts, and clamps with a high-quality penetrating oil. Let it soak for at least 30 minutes, or even overnight if the rust is severe. This step can make the difference between a smooth disassembly and a day spent fighting seized fasteners.
- Remove Old Components: Start by loosening the clamps or flange bolts connecting the pipe section. You may need a long breaker bar for leverage. If the bolts are hopelessly rusted, you may need to cut them off with a grinder or a reciprocating saw. Once the connections are loose, remove the bolts from the rubber exhaust hangers that support the pipe. With a helper, carefully maneuver the old pipe section out from under the truck.
- Prepare for Installation: Clean the flange surfaces on the remaining exhaust sections using a wire brush or gasket scraper to ensure a good seal. Compare the new pipe to the old one to confirm it is the correct shape and length.
- Install the New Pipe: With your helper, guide the new pipe into position. Loosely attach it to the rubber hangers to support its weight. If using flanges, place a new gasket between the flanges and start the new bolts by hand. If using clamps, slide them over the joints.
- Align and Tighten: Align the entire system to ensure there is adequate clearance from the chassis, drive shafts, and other components. Once you are satisfied with the alignment, begin tightening all clamps and bolts. Work from one end to the other, tightening fasteners evenly. Use a torque wrench on flange bolts if specifications are available.
- Final Check: Once everything is tightened, start the engine. Listen and feel for any leaks at the new connections. A small leak will be audible as a ticking or puffing sound. If you find a leak, you may need to readjust the alignment and retighten the fasteners.
Post-Installation Checks and Testing: The Final Verification
Completing the physical installation is not the end of the job. It is a critical juncture that must be followed by a rigorous verification process. This final phase ensures that the new part is functioning correctly, that it has integrated properly with the vehicle's other systems, and that the vehicle is safe to return to service. Skipping these checks can turn a successful repair into a costly failure or a safety hazard.
The Road Test: A Dynamic Assessment
The most important post-installation check is a thorough road test. This is where you move from a static, workshop environment to a dynamic, real-world assessment. The road test should be conducted methodically.
- Initial Operation: Before driving, start the engine and let it idle. For a part like a blower motor, test its function through all speeds. For an air flow meter, observe the idle quality. Is it smooth or rough? For a transmission solenoid, shift through the gears (P, R, N, D) while stationary, feeling for proper engagement. For a hand brake valve, listen for air leaks as the system pressurizes.
- Low-Speed Maneuvers: Begin by driving slowly in a controlled area like a large, empty parking lot. Pay close attention to the sounds and feelings of the vehicle. For a transmission repair, feel for smooth shifts at low speeds and low RPMs. For a brake valve repair, test the brake application and release.
- Normal Driving Conditions: Proceed to test the vehicle under normal driving conditions. This includes acceleration, deceleration, and cruising at various speeds. Listen for any unusual noises, vibrations, or hesitations. Monitor the dashboard for any warning lights. For an exhaust pipe replacement, listen for rattles or leaks that may only become apparent when the chassis is flexing.
- Stress Testing (Where Appropriate): For performance-related parts like an air flow meter or transmission solenoid, you may want to perform some harder accelerations (where safe and legal to do so) to ensure the component performs correctly under load. For brake components, perform a few firm stops to bed in new parts and confirm proper operation.
Final Inspection and System Scans
After the road test, perform one last visual inspection. Park the vehicle and, once it has cooled down, look over your work. Check for any fluid leaks (transmission fluid, coolant), exhaust leaks, or loose fasteners. Ensure all wires and hoses are properly routed and secured away from hot or moving parts.
For any repair involving electronic components, such as a transmission solenoid or air flow meter, the final step should be to scan the vehicle's computer system with an OBD-II scanner. Even if the check engine light is not on, there may be "pending" or "stored" codes that can provide valuable information. Clear any codes related to the repair you performed. Driving the vehicle through a full "drive cycle" (a specific sequence of driving that varies by manufacturer) will allow the ECU to run all its self-tests and confirm that the repair was successful. A clean scan after a full drive cycle is the ultimate confirmation of a job well done.
Frequently Asked Questions (FAQ)
1. What are the most important safety precautions before I start to install truck parts? The most critical safety steps are to ensure the truck is on level ground with the wheels chocked, disconnect the negative battery terminal to prevent electrical issues, and wear appropriate Personal Protective Equipment (PPE), including safety glasses and gloves. If lifting the vehicle, always use jack stands rated for the truck's weight.
2. How do I know if I have the correct replacement part for my truck? The most reliable method is to use your truck's Vehicle Identification Number (VIN). Reputable suppliers can use the VIN to cross-reference and guarantee you receive the exact part designed for your truck's specific make, model, year, and engine configuration. Visually comparing the new part to the old one before installation is also a good final check.
3. What is a torque wrench, and why is it so important? A torque wrench is a specialized tool used to tighten a fastener to a specific, predetermined rotational force (torque). It is vital because every critical bolt on a truck has a torque specification from the manufacturer. Over-tightening can damage the part or stretch the bolt, while under-tightening can allow components to come loose, leading to catastrophic failure, especially with brake and suspension parts.
4. What should I do if I get stuck in the middle of an installation? First, stop and take a break to clear your head. Do not force any components. Re-read the service manual instructions or re-watch a tutorial video. Often, the solution is a small detail you may have missed. If a bolt is seized, apply more penetrating oil and give it time to work. If you are truly stuck, it is better to seek advice from a professional mechanic than to risk damaging the vehicle.
5. After installing a new electronic part like an air flow meter, my truck is running rough. What went wrong? This can happen for a few reasons. First, ensure the electrical connector is fully seated and clean. Second, the ECU may still be using fuel trim data learned from the old, faulty sensor. Disconnecting the battery for 15-30 minutes can often reset the ECU and force it to "re-learn" with the new sensor. Finally, it is possible the new part is defective or a low-quality counterfeit, which is why sourcing parts from a trusted dealer is crucial.
6. Why is it important to drain the air from the brake system before replacing a hand brake valve? The air brake system operates under high pressure, typically over 120 PSI. Attempting to disconnect an air line without first draining the system is extremely dangerous. The line can whip around with tremendous force, causing serious injury, and the sudden release of pressure can damage other system components. Always drain all air tanks until the dash gauges read zero.
Conclusion
The ability to install truck parts is a skill that blends technical knowledge with a disciplined, methodical practice. It moves beyond the simple act of turning wrenches and enters a realm of deeper engagement with the complex, integrated systems that define a modern heavy-duty vehicle. From the precise electronic signaling of a transmission solenoid to the fail-safe mechanical power of a spring brake, each component tells a story of engineering and purpose. By approaching each task with a foundation of safety, the correct tools, and a commitment to understanding the "why" behind each step, you elevate the work from a mere repair to an act of responsible stewardship. This disciplined approach not only ensures a successful installation but also fosters a more profound appreciation for the vehicle itself, transforming a maintenance task into a rewarding experience that enhances the longevity, safety, and performance of these essential machines.
References
All Truck Parts. (2025). The ultimate guide to air brake systems for heavy-duty trucks. Alltruckpart.com. Retrieved from
Chinatruck.cc. (2021, April 2). The air flow in truck brake system. Retrieved from https://www.chinatruck.cc/2308.html
FinditParts. (2025). Semi truck valves | Part replacement lookup & cross reference search. Retrieved from
Gao, J., Wang, X., Wang, J., & Wang, Y. (2021). Review of the mass air flow sensor for the engine air intake measurement. Measurement, 184, 109923.
Gzbrake.com. (2022, September 23). Types of truck air brake valve. Retrieved from https://www.gzbrake.com/news/types-of-truck-air-brake-valve.html
Majewski, W. A., & Khair, M. K. (2006). Diesel engine exhaust aftertreatment. SAE International.
WABCO. (2025). WABCO customer centre. Retrieved from